
14 SAML setup with OneLogin
Overview
This section provides guidelines for configuring single sign-on and user provisioning into Zabbix from OneLogin using SAML 2.0 authentication.
OneLogin configuration
Creating application
1. Log into your account at OneLogin. For testing purposes, you may create a free developer account in OneLogin.
2. In the OneLogin web interface navigate to Applications > Applications.
3. Click "Add App" and search for the appropriate app. The guidelines in this page are based on the SCIM Provisioner with SAML (SCIM v2 Enterprise, full SAML) app example.
4. To begin with, you may want to customize the display name of your app. You may also want to add the icon and app details. After that, click Save.
Setting up SSO/SCIM provisioning
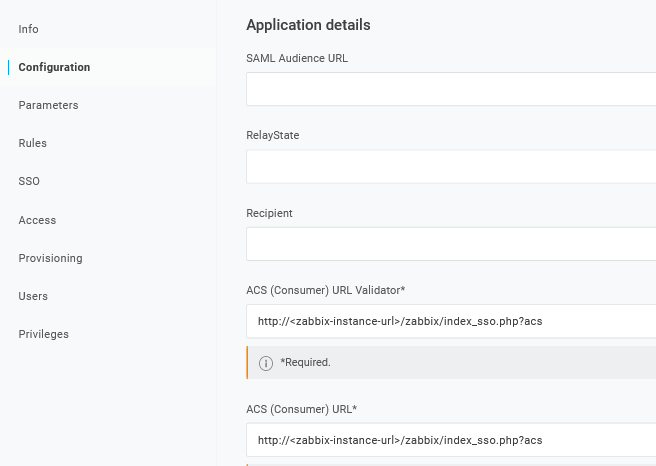
1. In Configuration -> Application details, set the Zabbix single sign-on endpoint http://<zabbix-instance-url>/zabbix/index_sso.php?acs as the value of these fields:
- ACS (Consumer) URL Validator
- ACS (Consumer) URL
Note the use of "http", and not "https", so that the acs parameter is not cut out in the request.
It is also possible to use "https".
To make that work with Zabbix, it is necessary to add to conf/zabbix.conf.php the following line:
$SSO['SETTINGS'] = ['use_proxy_headers' => true];Leave other options with their default values.
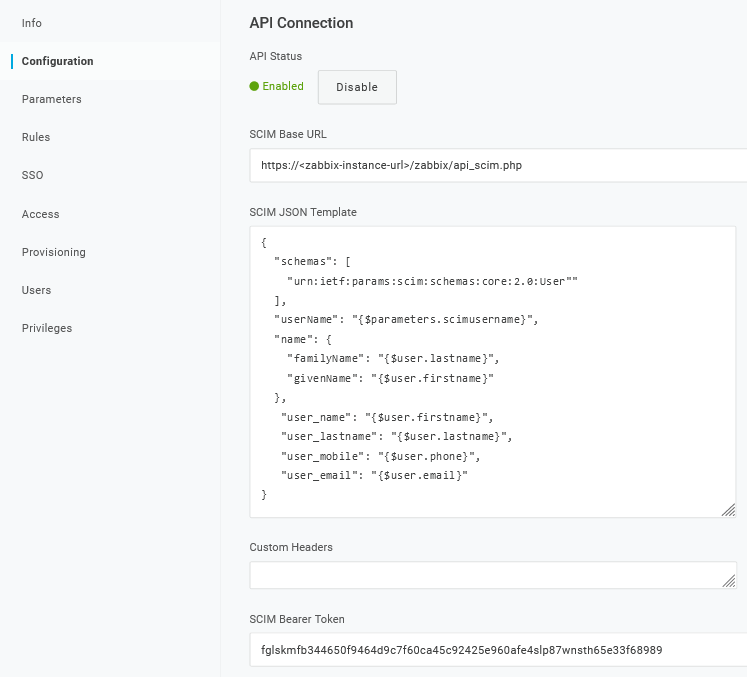
2. In Configuration -> API connection, set the following values:
- SCIM Base URL:
https://<zabbix-instance-url>/zabbix/api_scim.php - SCIM JSON Template: should contain all custom attributes that you would like to pass to Zabbix via SCIM such as
user_name,user_lastname,user_email, anduser_mobile:
{
  "schemas": [
    "urn:ietf:params:scim:schemas:core:2.0:User"
  ],
  "userName": "{$parameters.scimusername}",
  "name": {
    "familyName": "{$user.lastname}",
    "givenName": "{$user.firstname}"
  },
   "user_name": "{$user.firstname}",
   "user_lastname": "{$user.lastname}",
   "user_mobile": "{$user.phone}",
   "user_email": "{$user.email}"
}
The attribute names are arbitrary. Different attribute names may be used, however, it is required that they match the respective field value in Zabbix SAML settings.
Note that for user provisioning to work, OneLogin needs to receive in response a 'name' attribute with 'givenName' and 'familyName', even if it was not required by the service provider. Thus it is necessary to specify this in the schema in the application configuration part.
- SCIM Bearer Token: enter a Zabbix API token with Super admin permissions.
Click Enable to activate the connection.
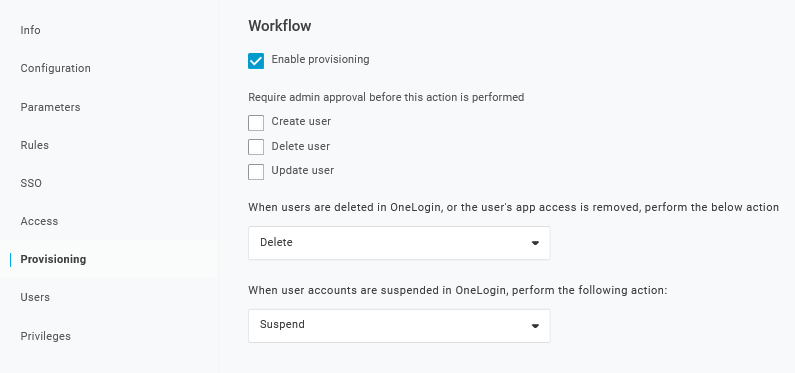
3. In the Provisioning page, enable the Provisioning option:
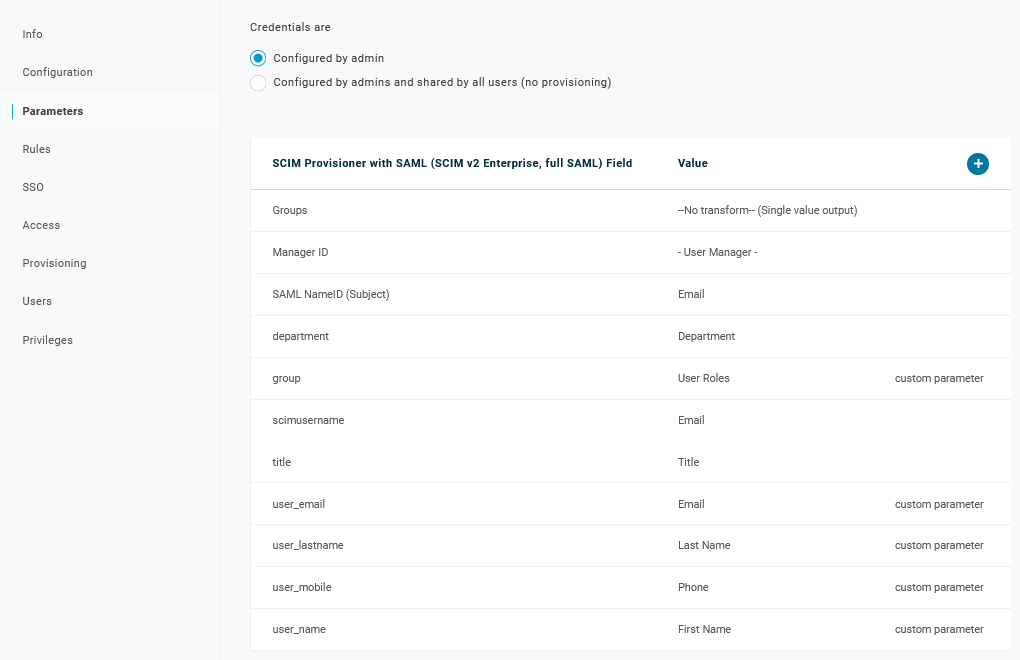
4. The Parameters page contains a list of default parameters:
- Make sure that the 'scimusername' matches the user login value in OneLogin (e.g. email);
- Mark the Include in User Provisioning option for the 'Groups' parameter;
- Click "+" to create the custom parameters that are required for SAML assertions and user provisioning such as
user_name,user_lastname,user_email, anduser_mobile:
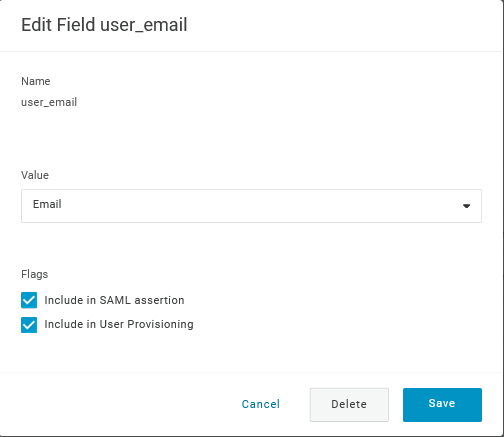
When adding a parameter, make sure to mark both the Include in SAML assertion and Include in User Provisioning options.
- Add a 'group' parameter that matches user roles in OneLogin.
User roles will be passed as a string, separated by a semicolon
;. The OneLogin user roles will be the used for creating user groups in Zabbix:

Verify the list of parameters:
5. In the Rules page, create user role mappings to the default Groups parameter.
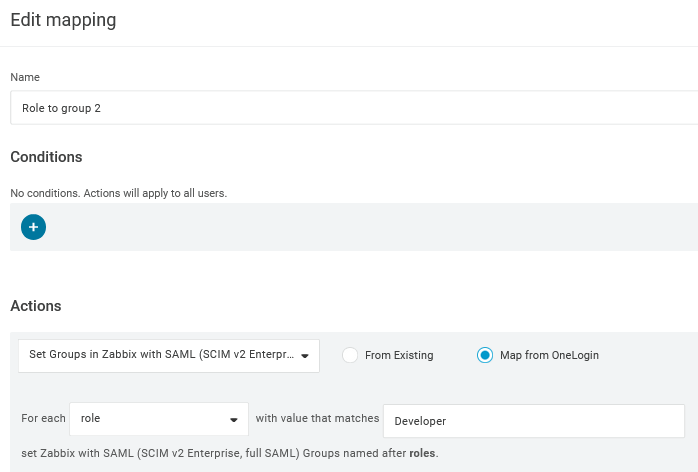
You may use a regular expression to pass specific roles as groups.
The role names should not contain ; as OneLogin uses it as a separator when sending an attribute with several roles.
6. Download the IdP certificate. Set 644 permissions to it by running:
chmod 644 idp.crtZabbix configuration
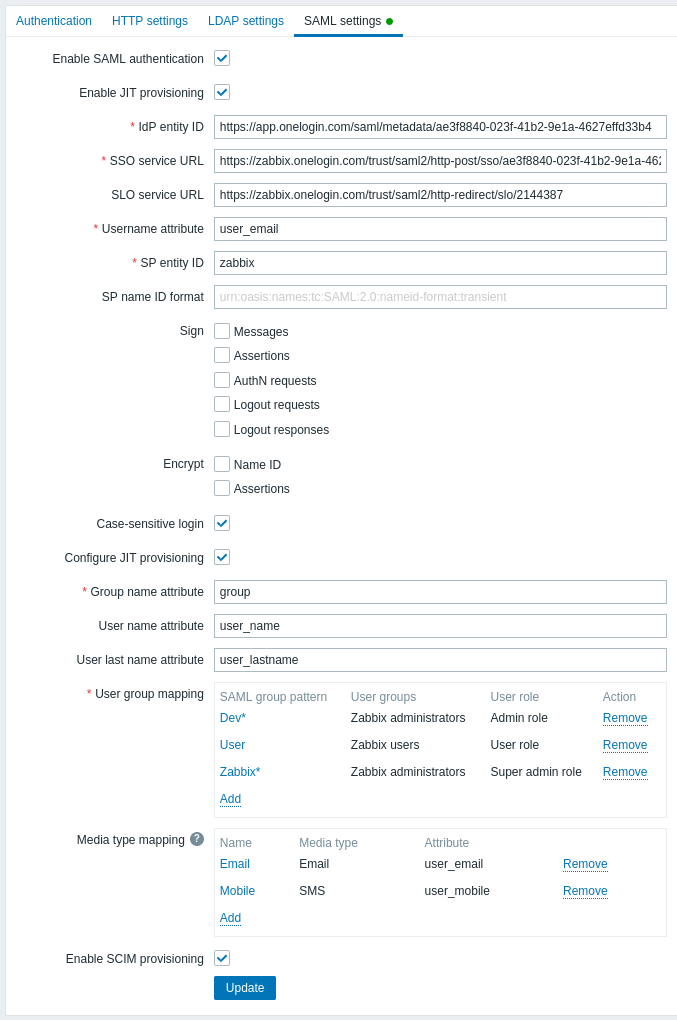
1. In Zabbix, go to the SAML settings and fill the configuration options based on the OneLogin configuration:
| Zabbix field | Setup field in OneLogin | Sample value |
|---|---|---|
| IdP entity ID | Issuer URL (see SSO tab of your application in OneLogin) |
|
| SSO service URL | SAML 2.0 Endpoint (HTTP) (see SSO tab of your application in OneLogin) |
|
| SLO service URL | SLO Endpoint (HTTP) (see SSO tab of your application in OneLogin) |
|
| Username attribute | Custom parameter | user_email |
| Group name attribute | Custom parameter | group |
| User name attribute | Custom parameter | user_name |
| User last name attribute | Custom parameter | user_lastname |
It is also required to configure user group mapping. Media mapping is optional. Click Update to save these settings.
2. Add the Base64 certificate provided by OneLogin.
If $SSO['CERT_STORAGE'] = 'database' is set in zabbix.conf.php, you can paste the certificate text or upload the certificate file in the frontend during SAML configuration — no files are required on the filesystem.
If $SSO['CERT_STORAGE'] = 'file' is set in zabbix.conf.php, the certificate must be made available on the filesystem (by default in ui/conf/certs or the path configured in zabbix.conf.php) and the frontend will not store certificates in the database.
Note that if $SSO['CERT_STORAGE'] is not set or is commented out, file storage is assumed and certificates are read from ui/conf/certs.
You can access the certificate download in OneLogin in Applications -> SSO -> click View details under the current certificate.
3. Click the Update button to save these settings.
SCIM user provisioning
With user provisioning enabled, it is now possible to add/update users and their roles in OneLogin and have them immediately provisioned to Zabbix.
For example, you may create a new user:
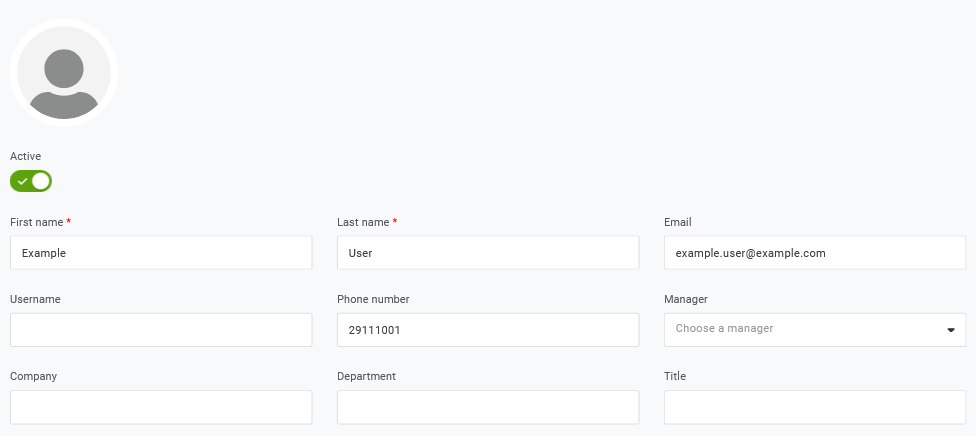
Add it to a user role and the application that will provision the user:

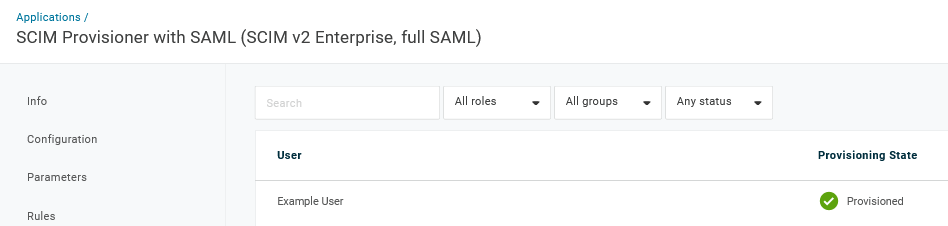
When saving the user, it will be provisioned to Zabbix. In Application -> Users you can check the provisioning status of current application users:
If successfully provisioned, the user can be seen in the Zabbix user list.
