Is this not what you were looking for? Switch to the current version or choose one from the drop-down menu.
10 SAML setup with Microsoft Entra ID
Overview
This section provides guidelines for configuring single sign-on and user provisioning into Zabbix from Microsoft Entra ID (formerly Microsoft Azure Active Directory) using SAML 2.0 authentication.
Microsoft Entra ID configuration
Creating application
1. Log into Microsoft Entra admin center at Microsoft Entra ID. For testing purposes, you may create a free trial account in Microsoft Entra ID.
2. In Microsoft Entra admin center select Applications -> Enterprise applications -> New application -> Create your own application.
3. Add the name of your app and select the Integrate any other application... option. After that, click on Create.
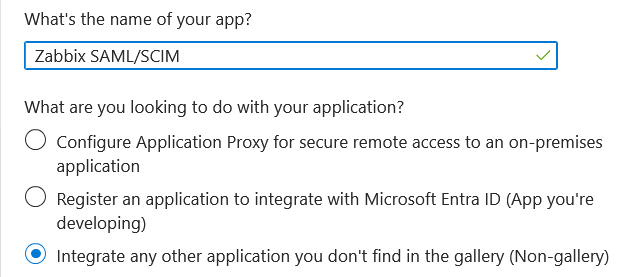
Setting up single sign-on
1. In your application page, go to Set up single sign on and click on Get started. Then select SAML.
2. Edit Basic SAML Configuration:
- In Identifier (Entity ID) set a unique name to identify your app to Microsoft Entra ID, for example,
zabbix; - In Reply URL (Assertion Consumer Service URL) set the Zabbix single sign-on endpoint:
https://<path-to-zabbix-ui>/index_sso.php?acs:

Note that "https" is required. To make that work with Zabbix, it is necessary to add to conf/zabbix.conf.php the following line:
$SSO['SETTINGS'] = ['use_proxy_headers' => true];3. Edit Attributes & Claims. You must add all attributes that you want to pass to Zabbix (user_name, user_lastname, user_email, user_mobile, groups).
The attribute names are arbitrary. Different attribute names may be used, however, it is required that they match the respective field value in Zabbix SAML settings.
- Click on Add new claim to add an attribute:

- Click on Add a group claim to add an attribute for passing groups to Zabbix:
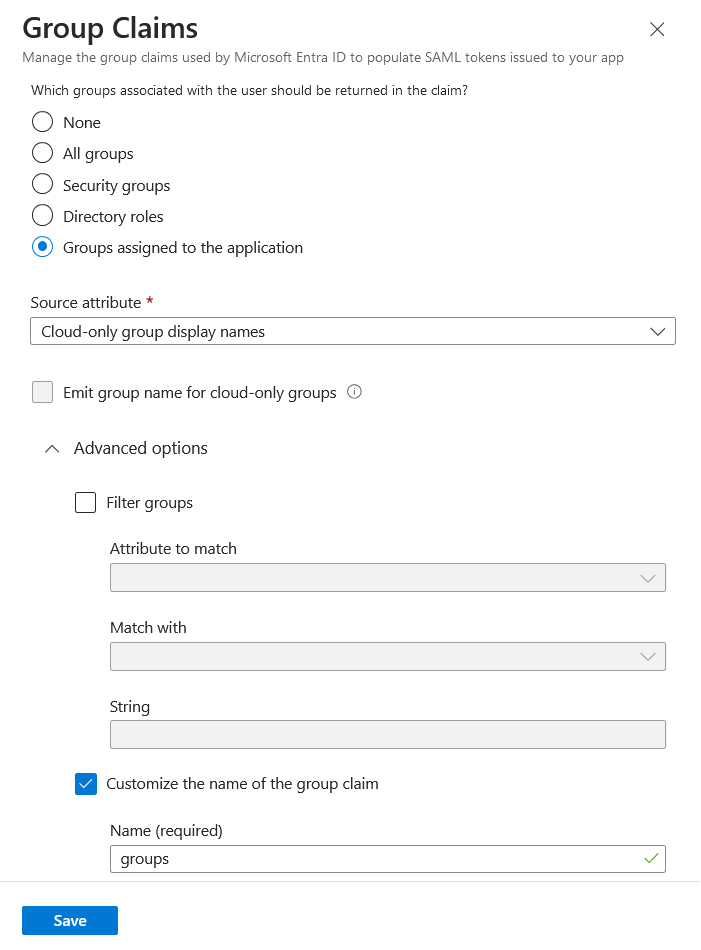
It is important in this claim that the group names (rather than group IDs) are passed to Zabbix by the selected Source attribute. Otherwise JIT user provisioning will not work properly.
4. In SAML Certificates download the Base64 certificate provided by Entra ID and place it into conf/certs of the Zabbix frontend installation.
Set 644 permissions to it by running:
Make sure that conf/zabbix.conf.php contains the line:
$SSO['IDP_CERT'] = 'conf/certs/entra.cer';5. Use the values from Set up <your app name> in Entra ID to configure Zabbix SAML authentication (see next section):

Zabbix configuration
1. In Zabbix, go to the SAML settings and fill the configuration options based on the Entra ID configuration:
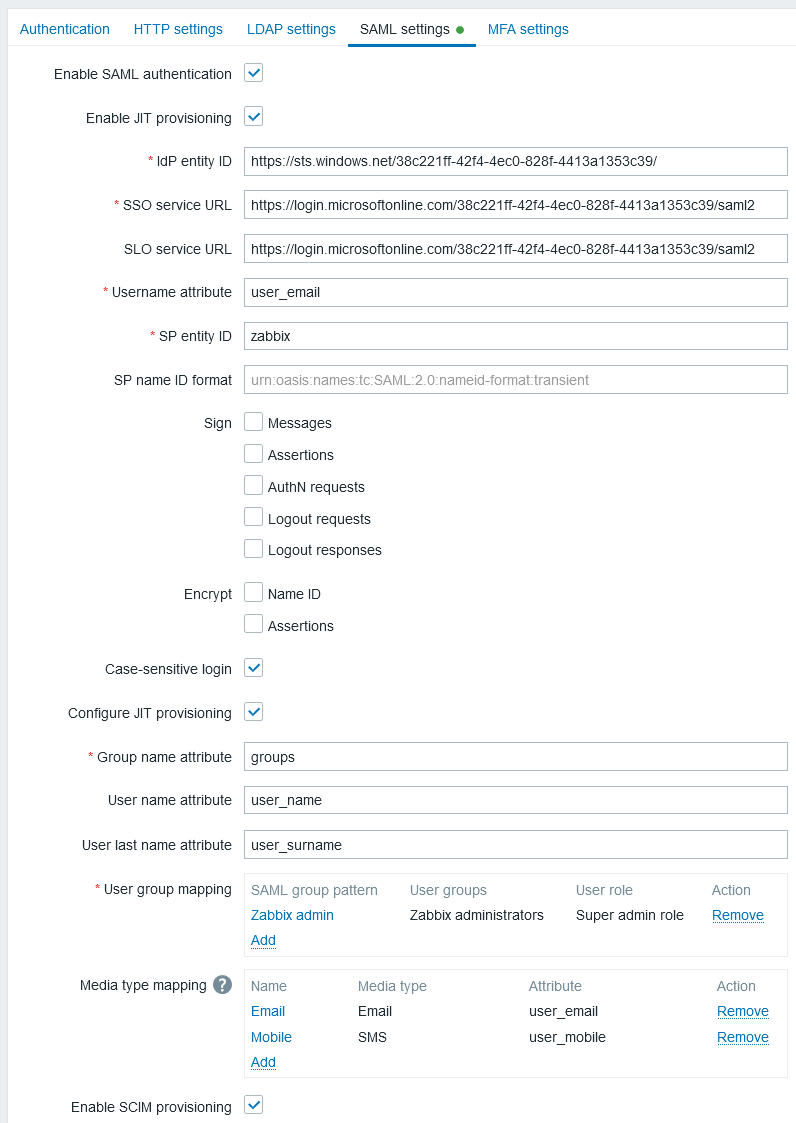
| Zabbix field | Setup field in Entra ID | Sample value |
|---|---|---|
| IdP entity ID | Microsoft Entra identifier | |
| SSO service URL | Login URL | |
| SLO service URL | Logout URL | |
| SP entity ID | Identifier (Entity ID) | |
| Username attribute | Custom attribute (claim) | user_email |
| Group name attribute | Custom attribute (claim) | groups |
| User name attribute | Custom attribute (claim) | user_name |
| User last name attribute | Custom attribute (claim) | user_lastname |
It is also required to configure user group mapping. Media mapping is optional.
Click on Update to save these settings.
SCIM user provisioning
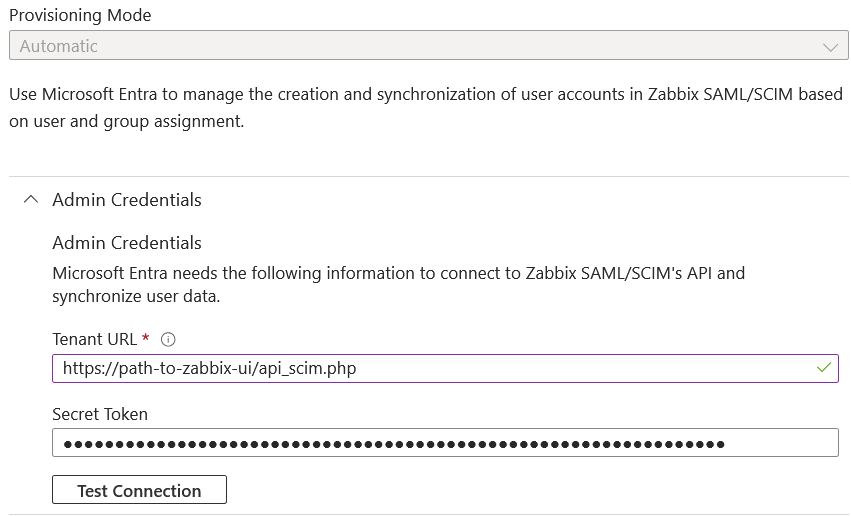
1. In your Entra ID application page, from the main menu open the Provisioning page. Click on Get started and then select Automatic provisioning mode:
- In Tenant URL, set the following value:
https://<path-to-zabbix-ui>/api_scim.php - In Secret token, enter a Zabbix API token with Super admin permissions.
- Click on Test connection to see if the connection is established.
2. Now you can add all the attributes that will be passed with SCIM to Zabbix. To do that, click on Mappings and then on Provision Microsoft Entra ID Users.
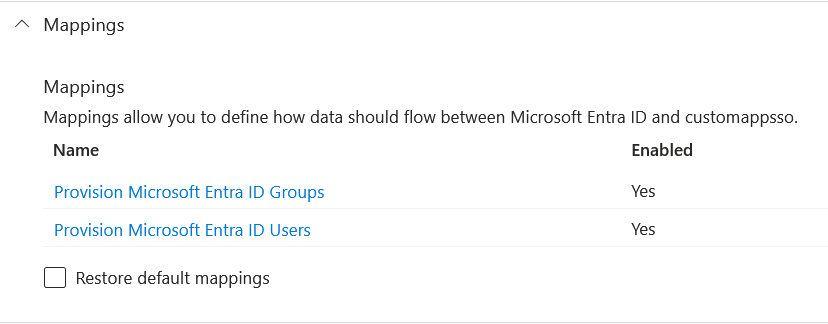
At the bottom of the Attribute Mapping list, enable Show advanced options, and then click on Edit attribute list for customappsso.
At the bottom of the attribute list, add your own attributes with type 'String':

Save the list.
3. Now you can add mappings for the added attributes. At the bottom of the Attribute Mapping list, click on Add New Mapping and create mappings as shown below:

When all mappings are added, save the list of mappings.

4. As a prerequisite of user provisioning into Zabbix, you must have users and groups configured in Entra ID.
To do that, go to Microsoft Entra admin center and then add users/groups in the respective Users and Groups pages.
5. When users and groups have been created in Entra ID, you can go to the Users and groups menu of your application and add them to the app.
6. Go to the Provisioning menu of your app, and click on Start provisioning to have users provisioned to Zabbix.
Note that the Users PATCH request in Entra ID does not support changes in media.

