
Table of Contents
Create a module (tutorial)
This is a step-by-step tutorial that shows how to create a simple Zabbix frontend module. You can download all files of this module as a ZIP archive: MyAddress.zip.
What you'll build
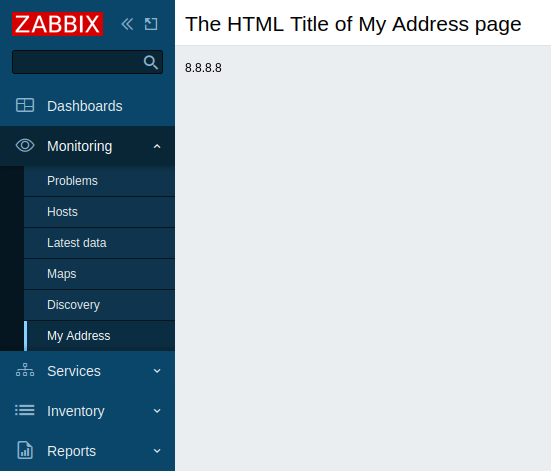
During this tutorial, you will first build a frontend module that adds a new My Address menu section and then convert it into a more advanced frontend module that makes an HTTP request to https://api.seeip.org and displays the response - the IP address of your computer - on a new page in the newly created My Address menu section. Here's how the finished module will look like:
Part I - New menu section
Add a blank module to Zabbix frontend
Create a directory MyAddress in the modules directory of your Zabbix frontend installation (for example, zabbix/ui/modules).
Create a manifest.json file with basic module metadata (see the description of supported parameters).
ui/modules/MyAddress/manifest.json
{
           "manifest_version": 2.0,
           "id": "my-address",
           "name": "My IP Address",
           "version": "1.0",
           "namespace": "MyAddress",
           "description": "My External IP Address."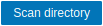
}- In Zabbix frontend, go to Administration → General → Modules section and click on the Scan directory button.
- Locate the new module My IP Address in the list and click on the "Disabled" hyperlink to change the module's status from "Disabled" to "Enabled" (if the module is not listed, see troubleshooting section).

The module is now registered in the frontend. However, it is not visible yet, because you still need to define the module functionality. Once you add content to the module directory, you will immediately see the changes in Zabbix frontend upon refreshing the page.
Create a menu section
- Create a Module.php file in the MyAddress directory.
This file implements a new Module class that extends the default CModule class. The Module class will insert a new My Address menu section into the main menu.
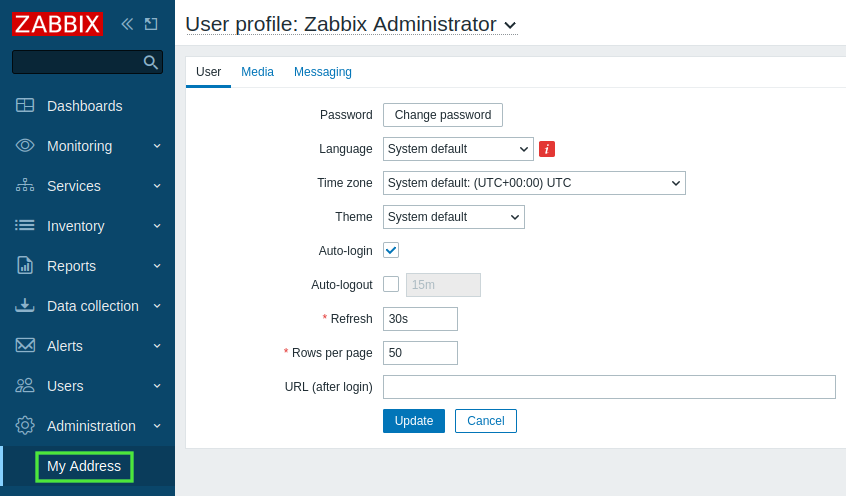
The setAction() method specifies an action to be executed upon clicking on the menu section. To start with, you can use the predefined action userprofile.edit, which will open the User profile page. In part III of this tutorial, you will learn how to create a custom action.
ui/modules/MyAddress/Module.php
<?php

       namespace Modules\MyAddress;

       use Zabbix\Core\CModule,
           APP,
           CMenuItem;

       class Module extends CModule {

           public function init(): void {
               APP::Component()->get('menu.main')
                   ->add((new CMenuItem(_('My Address')))
                   ->setAction('userprofile.edit'));
           }
       }
You can replace 'userprofile.edit' with other actions, for example, 'charts.view' (opens custom graphs), 'problems.view' (opens Monitoring → Problems), or 'report.status' (opens System information report).
- Refresh Zabbix frontend. There is now a new My Address section at the bottom of the Zabbix main menu. Click on My Address to open the User profile page.
Part II - Menu section location change
In this part, you will move the My Address menu section to the Monitoring section and then add a nested menu to it. As a result, users will be able to access two sub-menu pages from the Monitoring → My Address menu section.
- Open and edit the Module.php file.
ui/modules/MyAddress/Module.php
<?php

       namespace Modules\MyAddress;

       use Zabbix\Core\CModule,
           APP,
           CMenuItem;

       class Module extends CModule {

           public function init(): void {
               APP::Component()->get('menu.main')
                   ->findOrAdd(_('Monitoring'))
                   ->getSubmenu()
                   ->insertAfter(_('Discovery'),
                       (new CMenuItem(_('My Address')))->setAction('userprofile.edit')
                   );
           }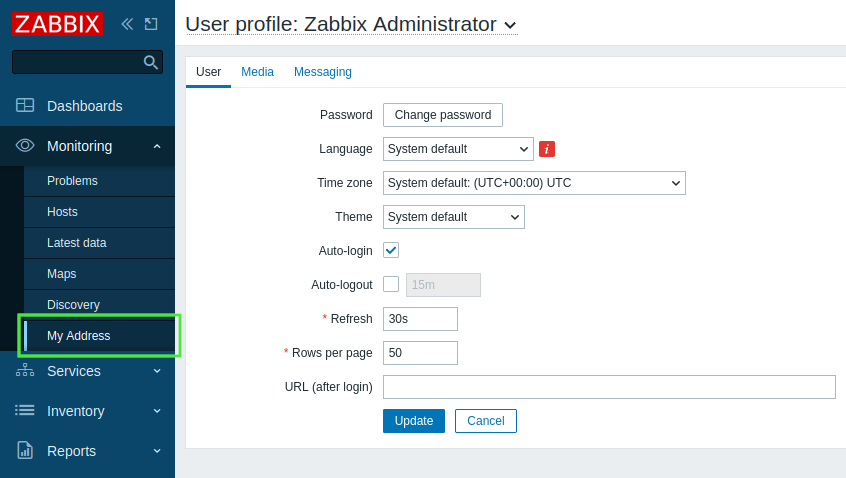
}- Refresh Zabbix frontend. Expand the Monitoring menu section and observe that the My address section is now located below the Discovery section.
- To add nested pages to the My Address menu section, open and edit the Module.php file again.
This step creates two subsections:
- External IP that executes a new 'my.address' action that will be defined in the next steps;
- User profile that executes the predefined 'userprofile.edit' action to open the User profile page.
Note that for the nested menu, you need to use the CMenu class in addition to the classes used in the previous steps.
ui/modules/MyAddress/Module.php
<?php

       namespace Modules\MyAddress;

       use Zabbix\Core\CModule,
           APP,
           CMenu,
           CMenuItem;

       class Module extends CModule {

           public function init(): void {
               APP::Component()->get('menu.main')
                   ->findOrAdd(_('Monitoring'))
                   ->getSubmenu()
                   ->insertAfter(_('Discovery'),
                       (new CMenuItem(_('My Address')))->setSubMenu(
                           new CMenu([
                               (new CMenuItem(_('External IP')))->setAction('my.address'),
                               (new CMenuItem(_('User profile')))->setAction('userprofile.edit')
                           ])
                       )
                   );
           }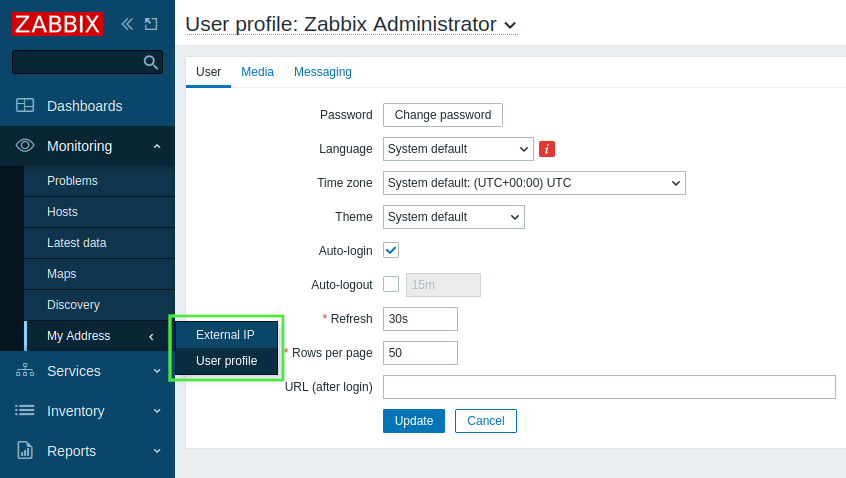
}- Refresh Zabbix frontend. Observe that the My address menu section now contains a third-level menu with two pages - External IP and User profile.
Part III - Module action
An action is implemented in two files - actions/MyAddress.php and views/my.address.php. The actions/MyAddress.php file takes care of the business logic implementation, while the views/my.address.php file is responsible for the view.
Create a directory actions in the MyAddress directory.
Create a MyAddress.php file in the actions directory.
The action logic will be defined in the MyAddress class. This action class will implement four functions: init(), checkInput(), checkPermissions(), and doAction(). Zabbix frontend calls the doAction() function when the action is requested. This function is responsible for the business logic of the module.
The data must be organized as an associative array. The array can be multidimensional and may contain any data expected by the view.
ui/modules/MyAddress/actions/MyAddress.php
<?php

       namespace Modules\MyAddress\Actions;

       use CController,
           CControllerResponseData;

       class MyAddress extends CController {

           public function init(): void {
               $this->disableCsrfValidation();
           }

           protected function checkInput(): bool {
               return true;
           }

           protected function checkPermissions(): bool {
               return true;
           }

           protected function doAction(): void {
               $data = ['my-ip' => file_get_contents("https://api.seeip.org")];
               $response = new CControllerResponseData($data);
               $this->setResponse($response);
           }
       }
Create a new directory views in the MyAddress directory.
Create a my.address.php file in the views directory and define the module view.
Note that the variable $data is available in the view without specifically defining it. The framework automatically passes the associative array to the view.
ui/modules/MyAddress/views/my.address.php
<?php

       (new CHtmlPage())
           ->setTitle(_('The HTML Title of My Address Page'))
           ->addItem(new CDiv($data['my-ip']))
->show();- The module action has to be registered in the manifest.json file. Open manifest.json and add a new object
actionsthat contains:
- the action key with the action name written in lowercase (a-z) and with words separated by dots (for example,
my.address); - the action class name (
MyAddress) as a value for theclasskey of themy.addressobject; - the action view name (
my.address) as a value for theviewkey of themy.addressobject.
ui/modules/MyAddress/manifest.json
{
           "manifest_version": 2.0,
           "id": "my-address",
           "name": "My IP Address",
           "version": "1.0",
           "namespace": "MyAddress",
           "description": "My External IP Address.",
           "actions": {
               "my.address": {
                   "class": "MyAddress",
                   "view": "my.address"
               }
           }
}- Refresh Zabbix frontend. Click on My address → External IP to see the IP address of your computer.