Source: https://git.zabbix.com/projects/ZBX/repos/zabbix/browse/templates/media/zendesk?at=release/7.2

Zendesk Webhook
How it Works
If a trigger fires, Zabbix will send an event to a service in Zendesk. Event from Zabbix will trigger a new incident on the Zendesk service.
The Zendesk tickets are created for Problem, Problem recovery, Problem update, Discovery, Autoregistration, Internal problem events. Internal problem recovery event is unsupported.
The Zendesk ticket type field is defined in the zendesk_type parameter of the media. The following event types are supported: question, incident, problems, task.
Custom fields and the subject field are updated when the update action (Problem update or Problem recovery) is performed.
Tags, priority, and status fields are filled in only when creating a ticket. They are not overwritten when the update action is performed.
Custom fields can only be of the text, number, or date types. Other field types or nonexistent IDs will be ignored.
The {ALERT.MESSAGE} macro is used to fill in the ticket body for all actions.
The {EVENT.NAME} macro is used as a subject of a ticket for trigger-based events, the {ALERT.SUBJECT} macro is used for non trigger-based events.
Requirements
Zendesk webhook integration works with Zabbix version 7.0 or higher.
Support
- If you need help, use forum
- If you have encountered a bug, please report it using Zabbix Jira bug tracker.
Description
This guide describes how to integrate your Zabbix installation with Zendesk using the Zabbix webhook feature. This guide will provide instructions on setting up a media type, a user, and an action in Zabbix.
In Zendesk
1. Create a user to connect between Zabbix and Zendesk.
3. Copy the Active API Token into your integration with Zabbix.
In Zabbix
The configuration consists of a media type in Zabbix, which will invoke webhook to send alerts to Zendesk through the Zendesk API. To utilize the media type, we will create a Zabbix user to represent Zendesk. We will then create an alert action to notify the user via this media type whenever there is a problem detected.
Create Global Macro
1. Go to the Administration tab.
2. Under Administration, go to the General page and choose Macros from the drop-down list.
3. Add a macro {$ZABBIX.URL} with Zabbix frontend URL (for example http://192.168.7.123:8081).
4. Click the Update button to save the global macro.
Create a Zendesk media type
1. Go to the Administration tab.
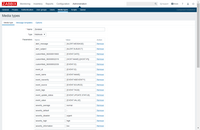
2. Under Administration, go to the Media types page and click Import button.
3. Select Import file media_zendesk.yaml and click Import button at the bottom to import the Zendesk media type.
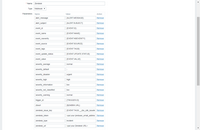
4. Change the value of zendesk_url and zendesk_token variables. Zendesk_type parameter determines the ticket type in Zendesk. One of the following types can be used: question, incident (default), problems, task.
In addition, you can override the severity mapping between the Zabbix problem and the Zendesk ticket.
5. If you have custom fields in Zendesk and you want them to be filled in with values from Zabbix, add parameters in the form customfield_<Zendesk custom field ID>. Custom fields can only be of the text, number, or date types.
Create the Zendesk user for alerting
1. Go to the Administration tab.
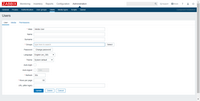
2. Under Administration, go to the Users page and click the Create user button.
3. Fill in the details of this new user, and call it “Media User”. The default settings for Zendesk User should suffice as this user will not be logging into Zabbix.
4. Click the Select button next to Groups.
- Please note, that in order to notify on problems with host this user must have at least read permissions for such host.
5. Click on the Media tab and, inside of the Media box, click the Add button.
6. In the new window that appears, configure the media for the user as follows:
- For the Type, select Zendesk (the new media type that was created).
- For Send to: enter any text, as this value is not used, but is required.
- Make sure the Enabled box is checked.
- Click the Add button when done.
7. Click the Add button at the bottom of the user page to save the user.
8. Use the Zendesk User in any Actions of your choice.
For more information, use the Zabbix and Zendesk documentations.
Supported Versions
Zabbix 7.0, Zendesk API.


