Event-Driven Ansible webhook
This guide describes how to integrate your Zabbix 7.0 installation with Event-Driven Ansible using the Zabbix webhook feature. This guide will provide instructions on setting up a media type, a user and an action in Zabbix.
Setting up Event-Driven Ansible Webhook
1. Make sure you have the webhook plugin loaded from the standard ansible collection (ansible.eda.webhook) and use ansible-rulebook v0.11.0 and higher.
2. Create a rulebook and specify a webhook from the standard eda collection (ansible.eda.webhook) as the event source. Specify listen address and port.
sources:
  - ansible.eda.webhook:
      host: 0.0.0.0
      port: 5001
3. Set necessary actions in the rules section. As an example you can use:
---
- name: Zabbix Test rulebook
  hosts: all
  sources:
    - ansible.eda.webhook:
        host: 0.0.0.0
        port: 5001
  rules:
    - name: debug
      condition: event.payload is defined
      action:
        debug:
4. For testing you can run ansible-rulebook with command:
ansible-rulebook --rulebook test-rulebook.yml -i inventory.yml --verbose
Note: before starting, make sure that the eda-server is running and you are in the eda-server virtual environment
Setting up Zabbix Webhook
The configuration consists of a media type in Zabbix which will invoke a webhook to send alerts to Event-Driven Ansible. To utilize the media type, you need to create a Zabbix user to represent Event-Driven Ansible. Then, create an alert action to notify the user via this media type whenever a problem is detected.
Note: only trigger-based and only problem events are currently supported
Create the Event-Driven Ansible media type
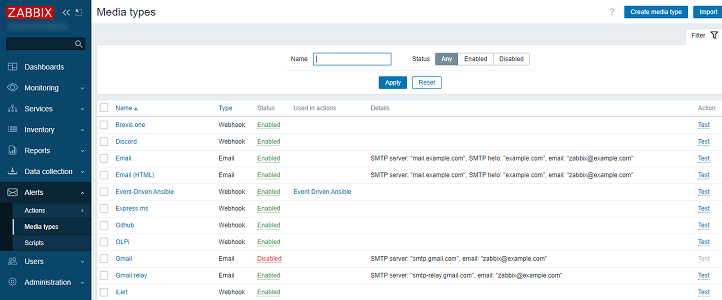
1. In the Alerts menu section, select Media types.
2. Click on the Import button in the upper right corner.
3. Select the file media_event_driven_ansible.yaml and press Import at the bottom.
Create the Event-Driven Ansible user for alerting
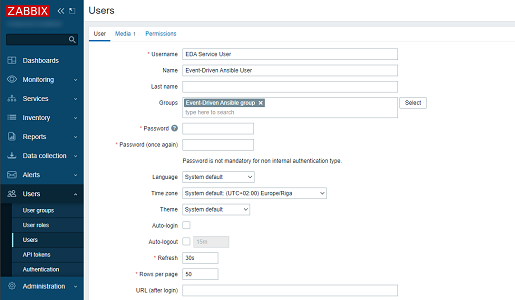
1. In the Users menu section, select Users.
2. Click on the Create user button in the upper right corner. Fill in the details of this new user.
Please note: in order to be notified of host problems this user must have at least read permissions for the given host.
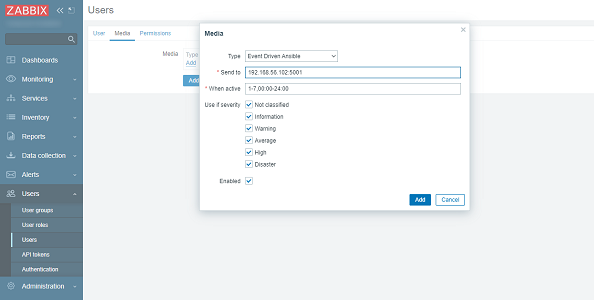
3. Navigate to the Media tab and click on the Add button inside of the Media box.
4. Configure the media type:
- Set Type to Event-Driven Ansible.
- In the Send to field, specify the IP address and destination port in the format
xxx.xxx.xxx.xxx:port. - Press Add to save the media type.
5. Press Add in the User configuration form to save the user.
Note: Because each new rulebook requires a separate port, you have to create a separate user for each rulebook, specifying the ip:port.
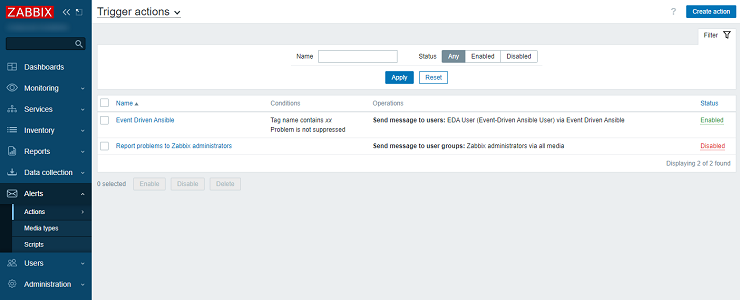
6. Use Event-Driven Ansible user in any actions of your choice.
7. Start getting alerts! You have made it!
For more information see Zabbix, Event-Driven Ansible and Ansible-Rulebook documentations.
Supported Versions
Zabbix 6.0 and higher


